If you’re a Windows 10 user and facing a problem of Windows 10 not shutting down after clicking the shutdown button, then don’t worry, here’s the solution to fix the bug. This problem may occur due to some reasons, and it can be fixed easily. First of all, when you click the shutdown button, the operating system closes down all the applications and then it turns off. But when it does not shut down, some specific software makes a bug, or else some other problems will be reasoned for this problem. Sometimes, the Windows will hibernate the kernel instead of shutting down itself after clicking the shutdown button. Here are the solutions to fix the problem of Windows 10 not shutting down.

Table of Contents
Did you know?
Fix the “Windows 10 Not Shutting Down” Problem in Two ways;
Normally, if your system doesn’t have any problem, it will shut down perfectly after selecting the power option. But, when it fails to shut down, then there is something wrong with your PC. It can be software that makes a bug, or issue in PC, etc. Often there’s a solution to every problem that occurs, by the way, this problem too has a solution. Shutting down a PC can be done in other ways, by using Notepad, and some other software. Follow the instruction which I’ve given below to fix the problem of Windows 10 not shutting down. Additionally, here’s the solution to “how to start your Windows 10 in safe mode“.
1. Shutdown using CMD(Command Prompt):
If your PC doesn’t shut down after selecting the shutdown option, you’ll need to do another way to shut down your PC. In that way, you can shut down your PC by using Command Prompt or Powershell. Here, I’ve navigated you the steps of using in Command Prompt. But the procedures will be the same for both CMD and Powershell. Here are the steps.
- First of all, click the start bar and then type “cmd “.Advertisement
- Then run the command prompt in “Administrator” mode.
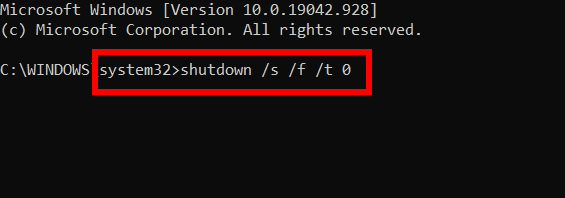
- After opening the cmd in administrator mode, copy-paste this code “shutdown /s /f /t 0” and press the “Enter” key.
- Finally, after doing this command, your PC will get shut down immediately.
2. Disable the Fast Startup Mode:
If you’re PC doesn’t get shut down after doing the above process, then do follow this method to shut down your PC. The Fast Startup mode is to start your computer faster and this mode doesn’t allow your computer to shut down. It hibernates your PC instead of shutting down fully. For avoiding this hibernation, we’re disabling this fast startup mode in Windows 10. This method will definitely make your PC shut down and personally, I won’t prefer to turn off this Fast Startup mode on PC because this mode will enable your PC to start up faster. Here are the steps to disable the Fast Startup mode in Windows 10.
1. At first, open “Settings” in your PC and then select the option named “System
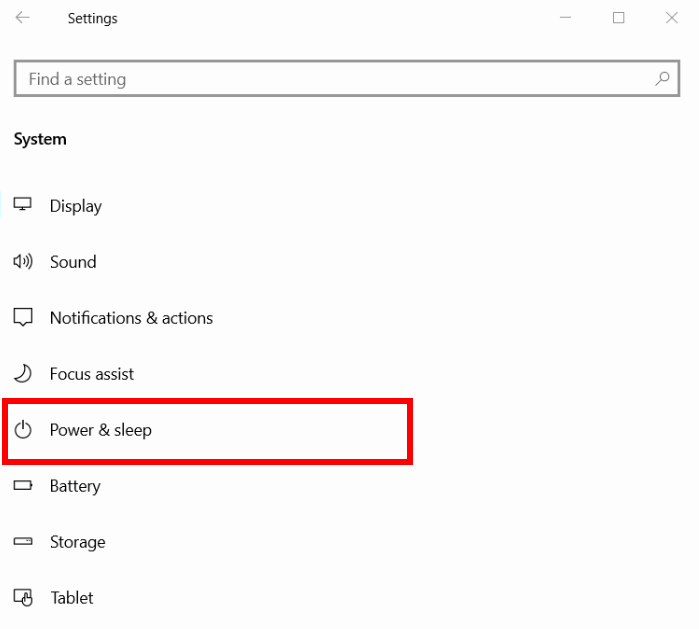
2. Then in System settings, choose “Power and sleep” option.
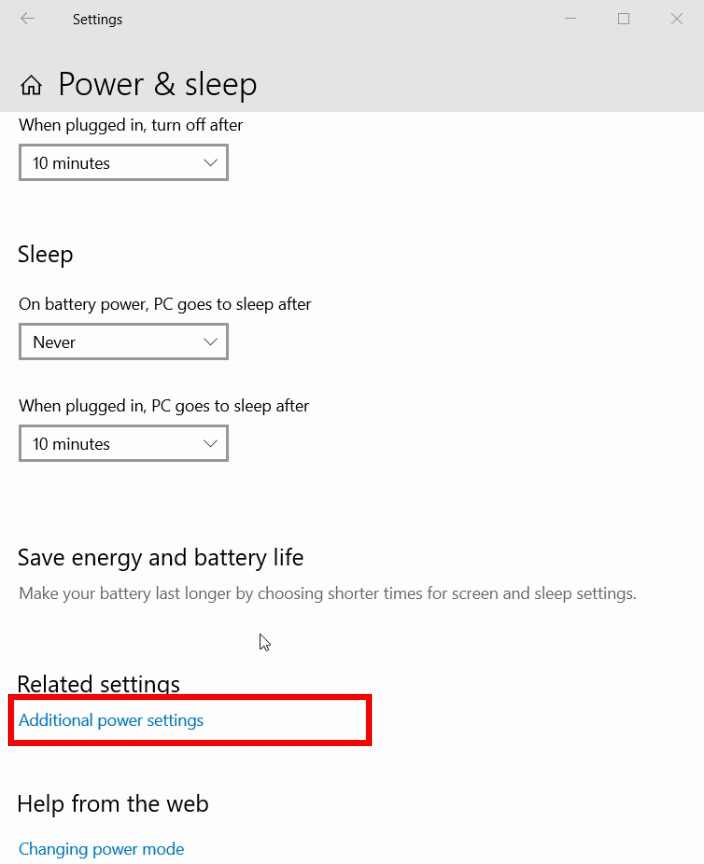
3. After that, scroll down and select the option named “Additional power settings“.
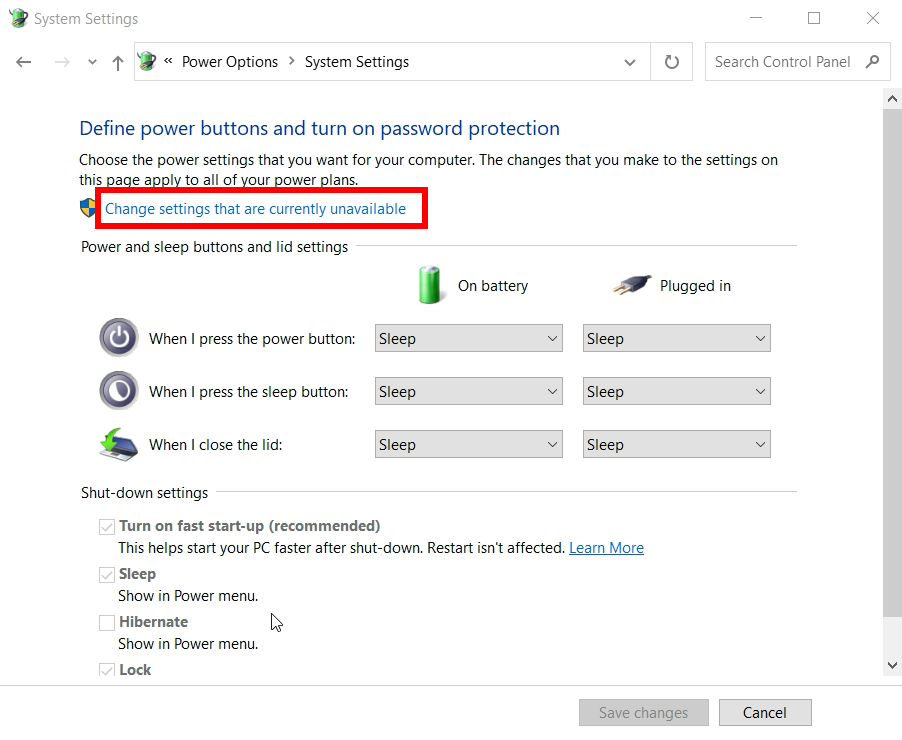
4. In this setting, select the option “Choose what power buttons do“, this option is located at the left side of the page. After selecting the option, once again select the option named “Change settings that are currently unavailable“.
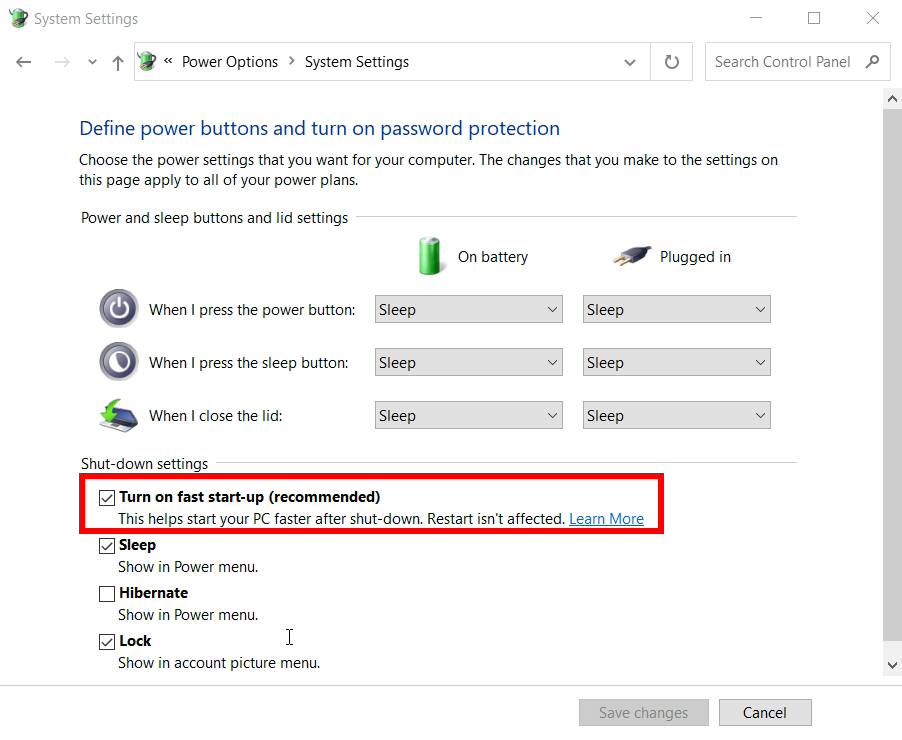
5. Finally, Turn off the fast startup mode which was enabled before. By disabling this mode, your PC will get shut down when your select the shut down button.
Summary
Final words before the completion of the article. This article is about the topic “How to fix Windows 10 not shutting down problem”. When a PC doesn’t shut down normally, then there is something wrong with the system. So, the user can try out other ways to shut down the PC. Here in this article, I’ve mentioned two solutions for fixing this problem. Just follow the instructions and fix the problem.



More Stories
How to Install Oracle Client 19c on Windows 10?
How to Report an Impersonation Account on Instagram?
How to Enable Enhanced Safe browsing on Google Chrome?