Today, technology has developed a lot and lots of new inventions are made instantly. By going with the technology, protecting or hiding some personal information inside media files has become handy for users. The process of hiding one file in another file is called Steganography. This Steganography is a quite old technique to hide the data inside another. But, here I’m gonna guide you towards the way of hiding text files inside a image file. The process which I’ve mentioned here is without using any kind of codes or commands and without the use of command prompt or other compilers. The reason is, there are so many tools were developed for this process, and hiding those text files inside images by using codes will take some time. Let’s crack the article for the process of steganography.
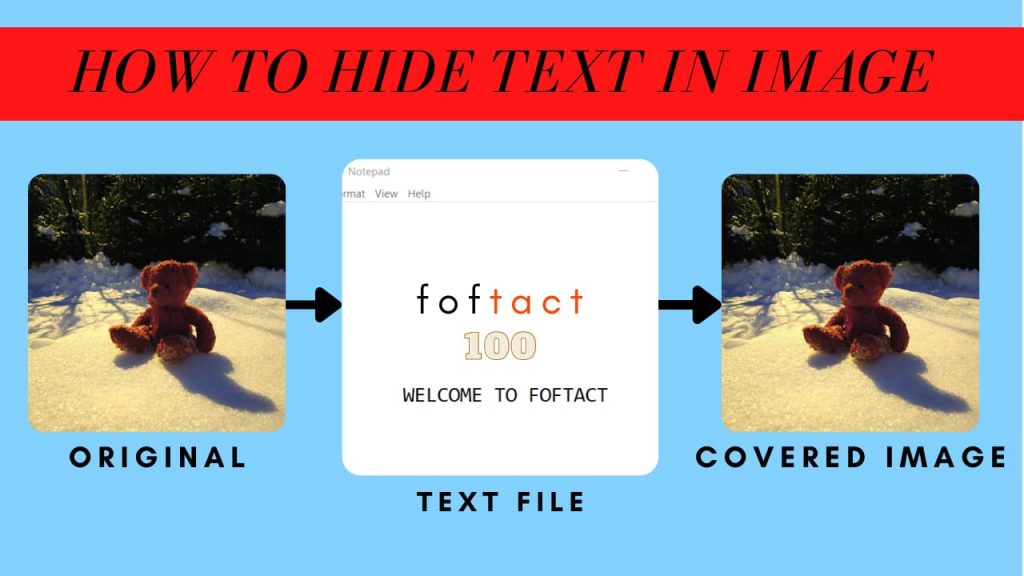
Table of Contents
Did you know?
Hiding a text file inside an image is an old technique named steganography. By using this process, one piece of data can be hidden inside another data. This process is widely used to protect some information from third persons. When you are done inserting the text data inside an image, then you can’t find much difference compared to the original image. Before getting on to the topic, I’ll just clear how the steganography process works and what kind of tools were used to do this steganography process.
What is Steganography and what are the tools used in Steganography?
In late 1800, Steganography was introduced. When time goes quickly, technology was also developed a lot and many tools were discovered. The steganography is the process where one piece of data is hidden in another data and it can be anything. At first, we need to encode the information in the media files and in between, the encryption process was also done. Once encoded, the original image will become a covered image. A covered image is nothing but, text will be covered inside the image file. The encoded or encrypted image can be decoded or decrypted for revealing the secured information.
Text, audio, video, image, network comes under the types of steganography process. If you understand clearly, the cover file and secret file are encrypted first and then passing the communication channel, the process is decoded. The entire process is done by changing the LSB bits in the RGB(Red, Blue, Green) colors in the image. Mostly, this steganography process is done by using codes or commands in some compilers, but here, I’ve mentioned a basic handy tool for doing this steganography process. Here are some tools used for the steganography process.
- SSuite Picsel
- Xiao Steganography
- OpenPuff
- Stegohide
How to hide Text inside Image using SSuite Picsel?
Above I’ve mentioned some tools for the steganography process. From that, I’ve chosen SSuite Picsel to hide text files inside the image. All other tools are also used for steganography. Below, I’ve mentioned the procedures for hiding text inside images by using SSuite Picsel. The process which is running on SSuite Picsel will be choosing an original image and then encrypting the message, and finally, the image is embedded. Once you finish encoding, you can use the same tool for revealing the hidden message. Here are the procedures for hiding text inside images by using SSuite Picsel.
NOTE: This software is available only for Windows, Ubuntu, and Linux. All the above-mentioned steps are similar for all the operating systems. I’ve used Windows 10 for the encoding and decoding process.
Procedures for Hiding Text inside Image by using SSuite Picsel:
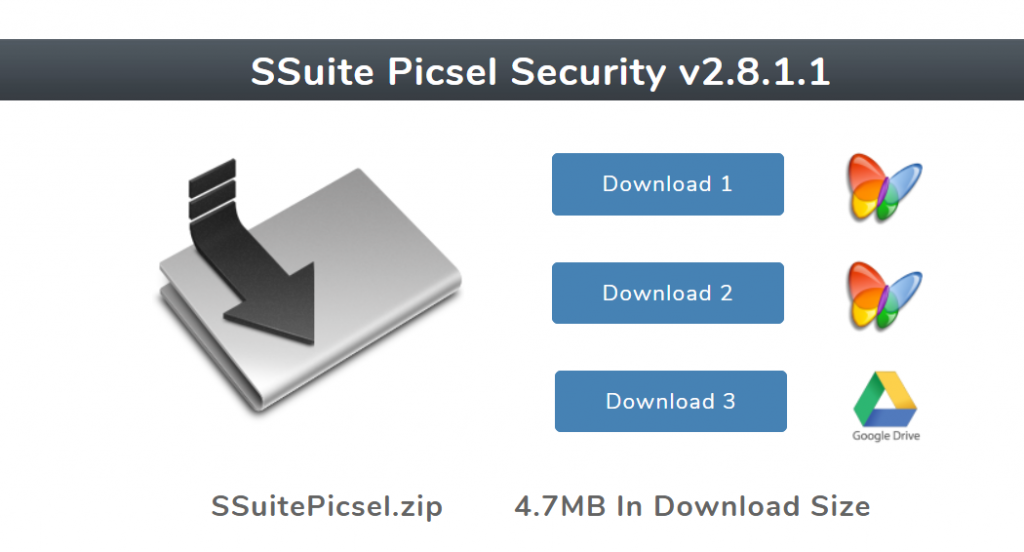
1. First of all, open any browser from your system, and then navigate to this link. There on this webpage, you can download the SSuite Picsel software in your system for free. The only thing you need to do is to choose the correct configuration that suits your system.
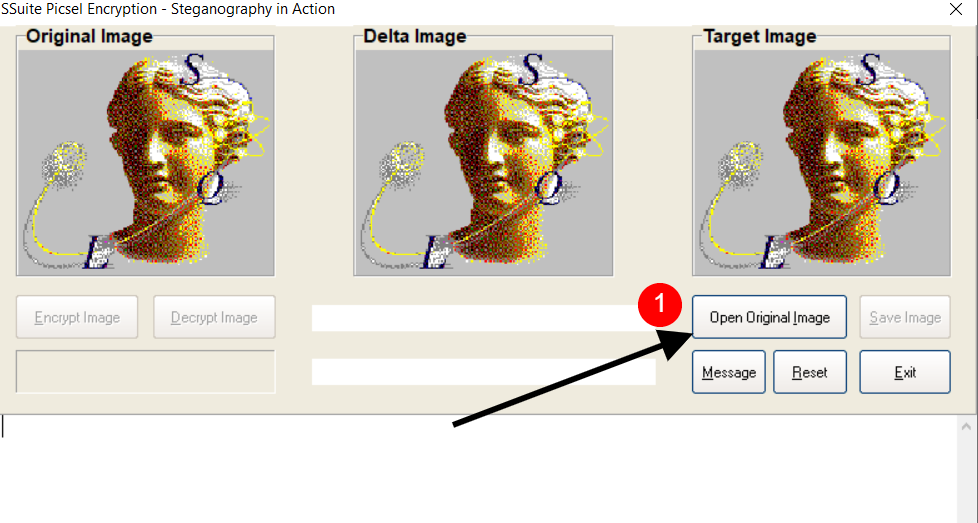
2. Then after downloading the software, install the software in your system and assign the proper location for it. Up next, open the installed software and insert the image in which you want to encode the secret message. The inserting image is named as the original image. For this, click the option named “Open Original Image“. Make sure that the image should be in BMP(Bit Map) or wave format.
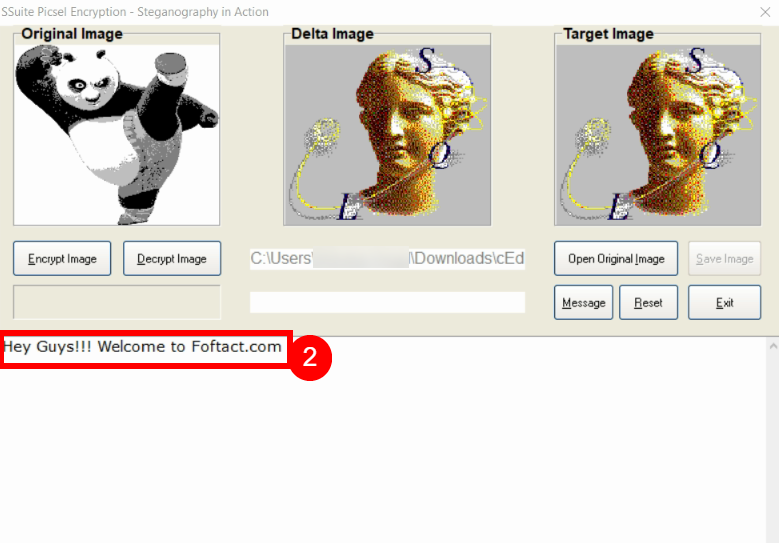
3. If you’ve trouble uploading the BMP file, or if you want to convert the PNG or JPEG file into BMP, just follow this link to conversion. After uploading the image, type the secret message which you want to hide inside the image. Once finished typing the secret message, select the “Encrypt Image
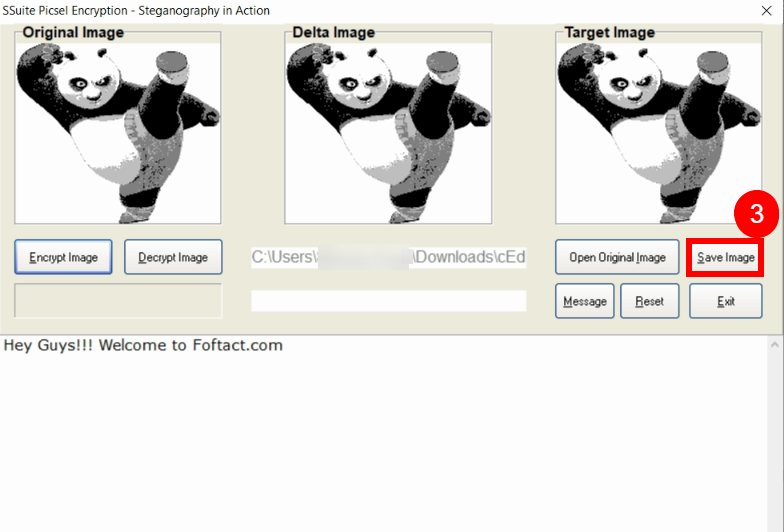
4. After encryption, click “Save Image” to save the encrypted image in your system. If you want to decode the encrypted image, close the opened SSuite Picsel software and reopen the software in your system. After opening, select the option “Open Original Image” and choose the original image which you’ve inserted at the very first of the process.
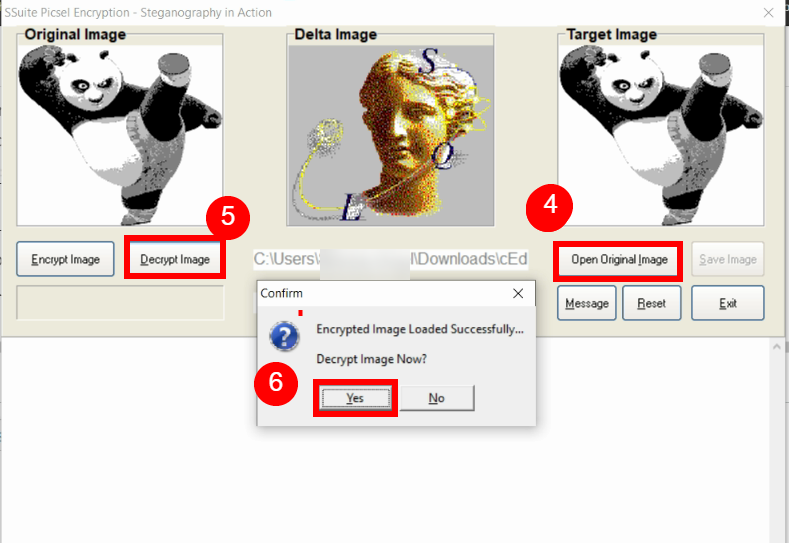
5. Here for the decoding process, the embedded or encrypted images act as a security for the encrypted message. When you’re finished inserting the original image, select the “Decrypt Image” option and a new window opens, where you need to choose the recently saved encrypted image. Finally, you need to confirm and click Yes to decode the secured information.
Summary
The final words before the completion of the article. This article all about the topic “How to hide text data inside an image“. This is the old process named steganography. Another process is called Cryptography where the text files are hidden inside the image. But, the Steganography holds the transparency, and robustness after the image is encrypted. Nowadays, there are so many ways are there like Coding, Command in CMD, and tools for doing Steganography. Here, I’ve mentioned the way without using the codes or commands. Just follow the above process and finish encoding in just 5 minutes.



More Stories
How to Install Oracle Client 19c on Windows 10?
How to Report an Impersonation Account on Instagram?
How to Enable Enhanced Safe browsing on Google Chrome?